March 25, 2014

The Only Skill You'll Need

The Only Skill You'll Need

What are your strengths?

Words uttered at the job interview that put your brain on stun. I recall my first interview for a technical job, I had to say, I google a lot. The interviewer laughed.

We often ask ourselves on what skills or abilities to develop to have a better career. Some are job specific, like programming or cooking, or are very general, writing or conversational skills. With that mentioned, I'd like to point out one best ability that served as the best in any situation and in any career.

Growing up, I have been to many industries: Fast Food, Call Center, Sales and Marketing, etc. In all these jobs, I have realized that there is always something new you could learn, from the simple to the complicated. Getting a good understanding on these things and learning them is the best skill there is, your cognitive ability.

What is your Cognitive Ability or Cognition?

Like I said, I google a lot, so here's the definition:
Cognition is the process by which the sensory input is transformed, reduced, elaborated, stored, recovered, and used.

Too technical? Well, in short, it's how fast you absorb things.

In a situation where everything is fast paced and pressure is all around, you need to be able to adjust and adapt accordingly, and this skill will be your friend.

So, now you know how important it is, but how do I bring the best out of it? Like they say, practice makes perfect. Constantly learn new things: Play a new game, Learn a new dance, Try a new recipe, just constantly challenge yourself and accomplish something each day. Start from the easiest, like writing a poem, to the crazy hard, like doing backflips on a motorcyle.

The next time you are out there, ask yourself,

What are my strengths?

March 20, 2014

Smoke Canned Tuna: Survivalist Style

Back in College and due to a lack of a kitchen, I mostly go out to "Karinderya's to have my fill." However, during late night study sessions, there will often be stomach hunger calls.

It's hard to concentrate studying on an empty stomach, so I normally stock on canned goods. Still though, they're boring and tasteless. Being the resourceful type and being experimental, I often try new things. We cooked the food within the can, putting coal under it and let it boil, but there is one way I never tried. I ran into a this step by step process on how to smoke your own tuna. It's awesome, I tried it and with great results.

This was usually done by the Israeli soldiers because part of their ration was mostly tuna.

For your viewing, I've listed the steps below.

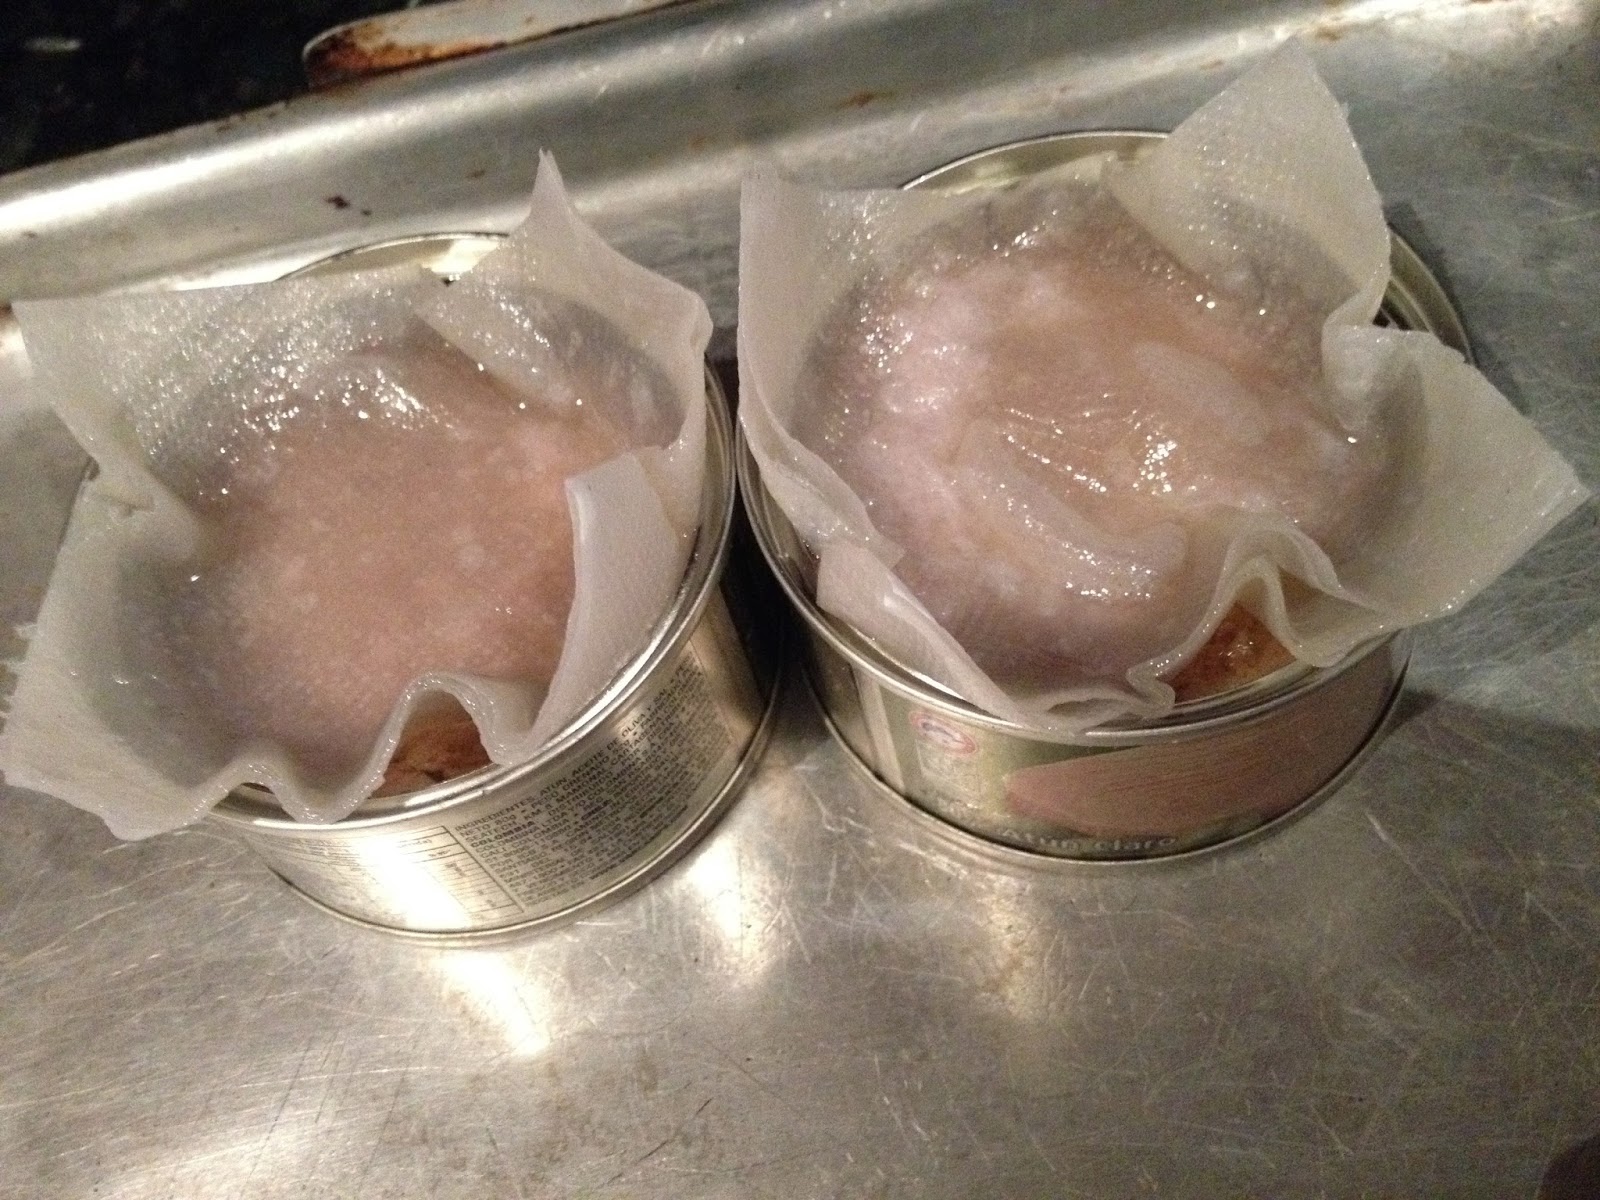
1. To do it you'll need tuna in any kind of oil, toilet paper and a source of flame, like a lighter. I also used a sheet pan to prevent making a mess and to transport the cans easily.

Smoke Tuna: Survivalist Style Step One


2. Open the cans and please, please, don't throw away the oil. Keep it all! Fold 3 sheets of toilet paper for each can. Double ply in this case. Don't ask me why, but napkins don't work as well. Really, I've tried and they don't keep the flame well.

Smoke Tuna: Survivalist Style Step Two


3. Since these are smaller cans I cut the paper into smaller squares, just slightly bigger than the can. If you're using a big can, this step would not be necessary.

Smoke Tuna: Survivalist Style Step Three


4. Push the sheets into the can being careful of not spilling the oil. Make sure the corners stick out. If you're patient, just wait until the oil gets all the way up to the corners. If you're impatient, just poke around a little until there are no dry spots.

Smoke Tuna: Survivalist Style Step Four


5. Notice the small hole under the toilet paper where you can see the tuna. Leaving this opening is really, REALLY important because if you don't do so, the paper will end up creating a seal around the can and after a while of being lit, the pressure will blow off the paper, spraying hot oil everywhere. And that's not very fun, is it? (Okay, it is kinda fun because there's a loud pop, the paper jumps in the air, and the burn scars would make for great stories, but still... do this at your own risk.)

Smoke Tuna: Survivalist Style Step Five


6. There's going to be plenty of smoke, so you'll probably want to move outside. Now you just need to light each corner and wait for the fire to spread.

Smoke Tuna: Survivalist Style Step Six


7. There, all corners lit! Now just sit there looking at the mesmerizing flames, enjoying the light and the heat, wondering why you've been throwing away the oil of many, many cans of tuna and feeling like a badass because you're cooking with actual fire instead of just microwaving some noodles.

Smoke Tuna: Survivalist Style Step Seven


8. This picture was taken 5 minutes after lighting the paper. There was enough oil to keep the paper lit for almost 25 minutes. Ideally you'd want to wait until the flame goes out. But if you don't have enough time or just prefer a subtler flavor, just blow it out.

Smoke Tuna: Survivalist Style Step Eight


9. The flame is out, so we're back inside. The paper will still be in one piece, except for some ashes around, which aren't hard to keep out of the can.

Smoke Tuna: Survivalist Style Step Nine


10. The paper comes off in a single piece and it does so rather cleanly. (Are you really going to lick the paper? Really? Alright, who am I to tell you that you shouldn't lick those delicious pieces of smoked fish off the paper instead of throwing them away.)

Smoke Tuna: Survivalist Style Step Ten


11. And there you go! You learned how to turn a lame, average can of tuna into something amazing. Because surviving in a post-apocalyptic environment doesn't mean you need to give up on your gourmet lifestyle. Eat it while it's warm and enjoy!

Smoke Tuna: Survivalist Style Step Eleven


It's real good and surprisingly filling. You really need to give it a try even though you're done with college.

How to Smoke Canned Tuna

March 19, 2014

Acne and Dairy, the Baffling Connection

Acne and Dairy, the Baffling Connection

Ever been plagued with Acne? I have, it was terrible. Aside from the low self esteem, getting a girlfriend was like playing on Hard Mode with only one life.

I got very conscious with it, I tried facial cleansers and soaps, none of which was able to help. Now, after all these years, I just wished I ran into this information earlier, this is the article: High school dietary dairy intake and teenage acne.

BACKGROUND:
Previous studies suggest possible associations between Western diet and acne. We examined data from the Nurses Health Study II to retrospectively evaluate whether intakes of dairy foods during high school were associated with physician-diagnosed severe teenage acne.

METHODS:
We studied 47,355 women who completed questionnaires on high school diet in 1998 and physician-diagnosed severe teenage acne in 1989. We estimated the prevalence ratios and 95% confidence intervals of acne history across categories of intakes.

RESULTS:
After accounting for age, age at menarche, body mass index, and energy intake, the multivariate prevalence ratio (95% confidence intervals; P value for test of trend) of acne, comparing extreme categories of intake, were: 1.22 (1.03, 1.44; .002) for total milk; 1.12 (1.00, 1.25; .56) for whole milk; 1.16 (1.01, 1.34; .25) for low-fat milk; and 1.44 (1.21, 1.72; .003) for skim milk. Instant breakfast drink, sherbet, cottage cheese, and cream cheese were also positively associated with acne.

CONCLUSION:
We found a positive association with acne for intake of total milk and skim milk. We hypothesize that the association with milk may be because of the presence of hormones and bioactive molecules in milk.

Well, what do you know. Back in Highschool, I drank Milk everyday. I loved it but if I could've known this connection, I could have avoided it entirely. Who wouldn't want good looking skin?

March 18, 2014

Brainstorm A Little Easier With These 7 Tips

An idea is best mixed with other's ideas
We have our share of brainstorming in our Careers and with each session is a feeling of disappointment and frustration. It's difficult to come up with plan, especially when everybody couldn't agree on it.

Everybody brainstorms a little differently, some even have their own methods to techniques. I've compiled mine, it has proven to have helped me come up with specific solutions and action plans to problems and it is in my hope that it does the same for you.

Listed below are my brainstorming steps:

DEFINE THE PROBLEM
List down some rules that your solutions need to follow so that you don't waste time going overboard with things that could not help you.

BREAK IT DOWN
Make it easier to tackle by breaking it down into smaller bits,

MAKE IT PERSONAL
Think about how the problem affects you personally.

SEEK OTHER'S PERSPECTIVE
Try and find as many people as possible who might have input and see what they have to say.

DIVERGE BEFORE YOU CONVERGE
Breed a little conflict into the discussion when you can. One way to do this is to have everyone write down their ideas before the meeting starts so everyone doesn't rally around the first idea just to get out of the meeting quickly.

CREATE AN "IDEA RESUME"
An "idea resume" is a one-page document that breaks down the basics of a solution.

CREATE A PLAN TO LEARN
Start designing a way to test your ideas and write out what you hope to learn from those tests.

These are not the only ways to brainstorm, but these steps can be an effective foundation to a thought process that you want to establish.

Have fun brainstorming.

March 17, 2014

Woke Up Tired? I Got The Solution For You

Did you sleep 10 hours yet still feel so tired? Slept for a few hours yet you are super energetic?
Sleeping more doesn't really give you an energetic wake up.

Woke Up Tired? I Got The Solution For You
Even the morning coffee couldn't do a thing

Sleep is a very important body process. It clears our mental fatigue, speeds up healing and restores our energy.

Waking up tired can make a whole day terrible. You'll find less motivation to do things after waking up on the wrong side of the bed.

In fact, sleep deprivation can lead to several things:

  • Impaired memory and thought processes
  • Depression
  • Decreased immune response
  • Fatigue
  • Increased pain

Ugh, what a terrible list. Moving on.

While Sleeping, you go through sleep cycles. This is the process of the brain to organize and complete its functions. A sleep cycle has 5 stages.

Stage 1: Sleepiness (Eyes are closed, yet can be awaken without difficulty)
Stage 2: Light Sleep (Your muscles become relaxed, heartbeat becomes slower)
Stage 3 & 4: Deep Sleep
Stage 5: REM Sleep (Dreaming Phase)

A sleep cycle is approximately 90 minutes.

For me, If I wake up during stages 3, 4 and 5, then I feel groggy and tired. I don't feel like standing up. So I lay back on my bed, and I cry on my pillow. (This is metaphorical, I don't really cry. My eyes are dried up because I stare at a computer monitor all day.)

I recommend using a sleep calculator for a better experience in waking up, for me I use Sleepytime. Just a simple and straightforward website.

This is very useful on busy work days and exam weeks. Just follow the recommended times on the calculator and I guarantee you a good morning and a good day afterwards.

March 16, 2014

Ease the Stress by Working Smarter, Not Harder


Stressed at Work
Stressed at work?

Working in an office, surrounded by deadlines and your boss, is your typical recipe for stress and eventually you'll end up getting sick. Aside from being productive, you need to ease up, follow some simple tips I have used for you to have a better work life. This Infographic gives some good tips on how to make it easier to work.


I've listed the most important tips below:
  • Keep a progress bar for a key project and fill in the sections as you complete a task
  • Wait five minutes to respond to an email/ speak up in a meeting
  • Read something new and challenging every day
  • Devote 30 to 60 minutes a day to solve a particularly challenging issue
  • Work in 20-minute chunks
  • Set a timer and get as many of the tasks done as you can within that time
  • Good night's sleep
  • Keep a file of positive feedback and revisit it when you are feeling particularly stumped or less than appreciated
  • Pick some smaller tasks you know you can truly complete. Use that momentum to create a snowball effect.
  • Set certain periods of time throughout the day to tackle your email, cell phone and instant messaging

When you work, you need to do it as efficiently as possible, in summary: More Result, Less Effort.

Here's the Infographic.

March 15, 2014

Things We Could Live With But Do Better Without


We go through our lives with little things that we could live with but could be better without. Headaches, sore throat, colds, and stomach pains are good examples.

Throughout, I have gathered some things I do when I have this so called aches. Listed below are some:

  • If you're coughing uncontrollably, raise your hands above your head and it will stop!
  • Pineapple juice is 5 times more effective than cough syrup. It also prevents colds and the flu.
  • If you feel like you're going to vomit, start humming. It's nearly impossible to gag while humming.
  • If you have a sore throat its good to eat a piece of cucumber. It cools down your throat and stops the itching.
  • Homemade Ice Packs: 1 part rubbing alcohol to 3 parts water in a ziploc bag. It gets cold but not hard, so you can easy manipulate it.
  • For Headaches, soaking your feet in hot water will help your head feel better.
  • Don't ever lie to your doctor, regardless of how embarassed you are about something. It could save your life.
Proven and tested by me personally. But then again I'm not a real doctor, so don't take it as medical advice. Take it as advice from someone experienced.

Now if we could only add hearth aches to the list, that would be perfect.

March 14, 2014

Keep your Monitors from Hurting your Eyes

Working with the computer late at night can really hurt the eyes. It burns most of the time and looking at all the details in documents and spreadsheets can really be confusing when the monitor is glaring at you.

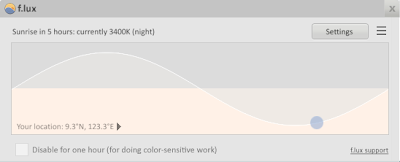
Then I came across F.lux.


It's a free software that automatically adjusts your monitors brightness and color depending on the time of day. It allows a soothing experience to the eyes. Although it takes a few hours to get used to the new color, it's definitely a must try.

I had been using the software for a year now and it has been good to my eyes. Since it removes that Eerie Blue Glow from your screen, it actually improves sleep the moment you hit the sack.

I highly recommend it for people who work at night.

Download here.

March 13, 2014

Get Productive and Have Fun at the Same Time

When I started working from home, one of the major problems was getting to focus. There are a lot of things to do yet I easily get distracted. As for habits, it was hard to dispose of bad ones and hard to start good ones. It was chore going through each day.

But when I played videogames, when there was a task, I could easily finish it, as it granted me with rewards that I can enjoy my game with. There was a certain level of satisfaction watching your avatar, your videogame character, progress through the game. It consumed so much time, yet I was enjoying it.

When you breakdown the details here, it boils down to two very simple concepts:

  • Doing Tasks is boring and tiring
  • Playing Games is fun and enjoyable

Now what if we make your things to do a game, what will that do? Genius!

habit rpg pinoy pro tips
The Game about your everyday life

Let's talk about Habit RPG. In summary, it's your usual to do task, but with a lot of twists, rewards, quests, swords and armor. A handful, right? What it succeeds on is putting your everyday tasks into a game setting. As you complete tasks and do good habits, you are rewarded, same concept with videogames after you complete a quest.

There are many habit-tracking apps, but HabitRPG takes a different spin: treating your goals and habits like a Role Playing Game (RPG). If you've played RPGs growing up, this app will make sense to you; otherwise, it may be overwhelming at first.


Even the interface looks like a game. You have your health bar, your experience points, even your arsenal of weapons and armor.

So how do you use it?

There are 4 Boxes on Tasks:

  1. Habits
  2. Dailies
  3. To-Dos
  4. Rewards

If you want to develop a habit, just type the name of it on the field provided and click the plus sign. You can edit to add details like extra notes and set its difficulty (rewards would depend on the difficulty). You can set the plus sign available if you want to develop a good habit, and the minus sign for bad habits. Whenever you do the bad habit and click the minus sign, it depletes your health bar and once that has run out, you're dead.

Dailies are similar to setup. These are the daily tasks that you need to complete (washing dishes, fixing bed, etc.).

To-Dos, to put it simply, are things you want to do. You can set a deadline and the sooner you get it done, the better the reward.

And lastly, Rewards is where you set your reward. Since you get gold for each task completed, this is where you spend it. You can set a reward like watching an episode of your favorite TV series and put in a gold requirement. If you feel like you want to watch more, but have no gold, then just complete more tasks. You should now see why this works.

It's a fun way of managing tasks, but I just want to emphasize, this is a to do list, an enjoyable one, but remember:


HabitRPG does not really know that you did any of the tasks you set up and then check. We have not set up cameras to watch you day and night, nor have we bribed your family to tell us if you're following your task lists. We're not a spy agency after all.

We believe in the honor system because, in the end, you only hurt yourself if you lie

For a tutorial on how to use HabitRPG, click on this Tutorial Video.

HabitRPG | Your Life the Role Playing Game


Look Good with a Pre Date Workout

Now that we're done talking about money, time for a more physical discussion, exercise.

Exercise has many uses. Whether it be building strength, pump up some muscles or improve your daily endurance, I have come across a workout that brings out your best look, great to do before the date.

The article from Greatist talks about it in good detail

We’re talking about a training protocol that will make muscles pop and tighten and brighten the skin for one night only.

Here's the workout:

ultimate pre date workout
You'll look model like.

As they said, you can break a sweat, in my experience, a lot, so remember to shower after. We don't want your date to whip out her air freshener.

I switch up my regular routine for this whenever I've got an event I attend, not just on dates. It's great and fast paced, and you'll end up feeling good too.

For more information on the workouts, please see videos below:
A1) Bent-Over Dumbbell Row
A2) Dumbbell Bench Press
A3) Dumbbell High Pull
B1) Seated Dumbbell Biceps Curl
B2) Decline Dumbbell Skullcrusher
B3) Seated Dumbbell Lateral Raise
C1) Push-Up with 15-Second Hold
C2) Chin-Up Hold

Date Night Work Out by Greatist

March 12, 2014

Save Money with this Method

When I first started getting income, I told myself,

"Ha! I will save 80% of my salary and retire early."
Being the thrifty type, I knew this was easy to accomplish. Back in High School, I never ate during breaks and brought packed lunch. The only time I would spend is when commuting. When going places, I would walk. I am really your embodiment of "Matipid."

Going back, obviously, I wasn't able to save such an unrealistic percentage. First salary, I was able to save 50%. Month after month, my savings went lower and lower. Temptation was everywhere.

I decided then to take my financial ways back on track. I read a lot of money saving literature and scoured around the net for tips and I found some things in common.

All of the discussion regarding money is done for the long term, your retirement. In a sense, this is one goal in your life, have a retirement fund able to sustain you in your late years. But the question now is how to get there?

There are several methods discussed, some dealing with bank transactions. One method has taken my attention. It was so simple, yet so effective, and has no requirement.

This is the Envelope Method. What is it?

envelope method
Magic's right here, folks.
It's partitioning your income into several envelopes and labeling them. What!? That's it? Shocked you right?

The secret here is that sense of accomplishment after you paid something, the acceptance that the money is gone. That's how it works.

When you put money in the envelope, it's technically gone and you have accomplished payment in advance. You won't have time to pay your bills all the time, so setting it aside on an envelope is as effective.

I started saving with six envelopes. One for savings, electricity bill, water bill, internet bill, rent and dailies, for food and other necessities. I started paying my savings first, then the dailies, then lastly, the bills. The bills are last in my case, because If I lack money for bills after paying everything else, they motivate me to secure more money through overtime and other jobs. At the end of every month, I always deposit my savings to the bank.

The advantages I got were overwhelming. I was never late on my bills, always had enough money from payday to payday and the sense of happiness that you have savings motivates you to work more. It was astounding!

As months pass, I started adding envelopes. For hobbies, computer upgrades, and gadgets.

What's the downside though, you ask? Well, it's still subject to temptation. Inside each of the envelopes are a stack of cash you can easily get, so why not indulge? Honestly, I have given in several times, but in the end, the empty envelope haunts me until I put money in.

The magic here is the psychology, and until now, I'm enjoying the magic.